

Be honest: when was the last time you thought about the quality of air blowing into your face while cruising on a hot day?
If you’re like most of us, the answer is probably “never.” We obsess over engine oil, gearboxes, and timing chains, but the humble cabin filter? It lives in the shadows—until it “shows you flames” with a funny smell or weak airflow.
Grab a coffee. This takes less than 10 minutes and costs less than a KFC Barrel.
Watch the full step-by-step DIY video above!
What You’ll Need
- The Filter: R145 from Goldwagen.
- Tools: Just your hands, you can use gloves if you don’t want it to get full of dust.
- Light: Your phone’s flash is perfect—it’s dark under there.
Step-by-Step Guide
Step 1: The Passenger Footwell
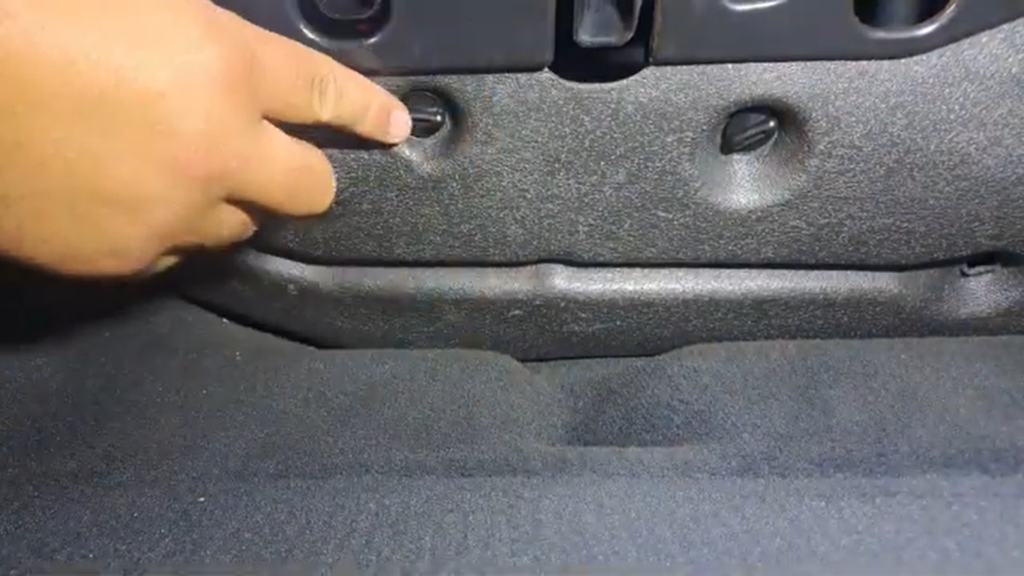
Get your head into the passenger side footwell and look up. You’ll see a foam trim cover held by two plastic thumb screws.
Step 2: Remove the “Curtain”
Pull that foam cover down gently.
Step 3: Clip it out, Don’t Pull
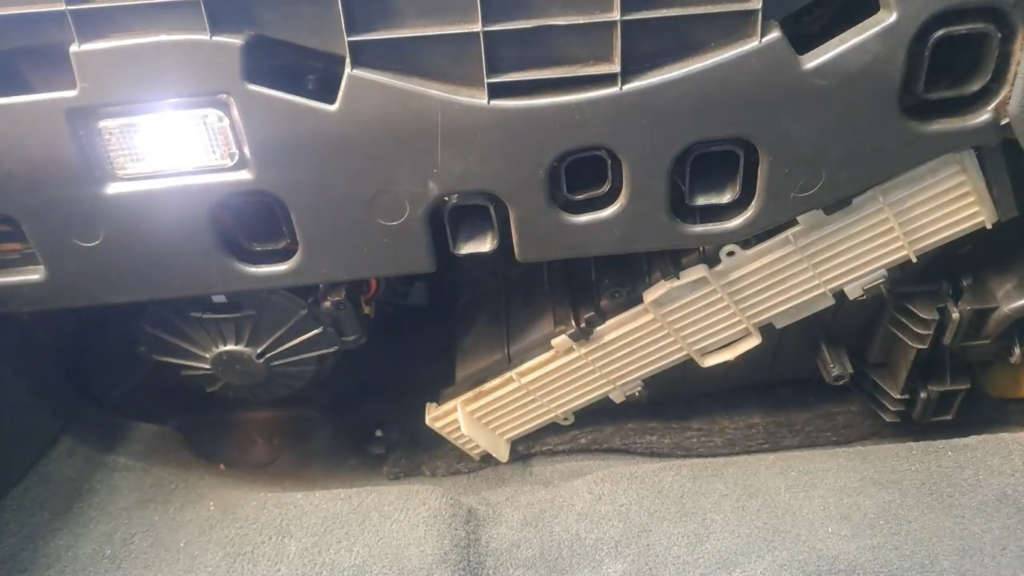
You’ll see a long white plastic strip. This is the filter cover. Slide it to the left (towards the door). It will click and drop down.
Step 4: The Horror Show
Pull the old filter straight down. Expect sand, leaves, and maybe a few Mzansi ants. Take a second to compare the old, black filter to your fresh white one.

Step 5: Insert New Filter
Slide the new filter in. It’s a tight fit because of the angle.
Pro Tip: Angle it in sideways first, then rotate it straight as you push up. Ensure the corner cut out is facing the right way—it only fits perfectly one way.
Step 6: Lock it Up
Slide the plastic cover back to the right to lock. Put the foam trim back on and tighten those thumb screws.
And Bob’s your Malume.